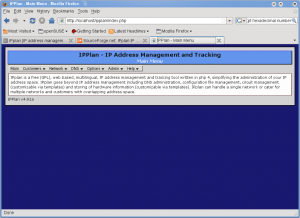
IPplan is a free opensource IP Address management application. IPPlan is a web based IP address management software and tracking tool simplifying the administration of your IP address space. IPplan goes beyond IP address management including DNS administration, configuration file management, circuit management and storing of hardware information. IPplan can handle a single network or cater for multiple networks and customers with overlapping address space. Makes managing ip addresses and managing ip address space simple and easy.
Features of IPPlan include
Supports MySQL, Postress, Oracle, MS SQL and runs on Windows and Linux
Import network definitions from routing tables
Import definitions from TAB delimited files and NMAP’s XML format
Multiple administrators with different access profiles (per group, allowing access per customer, per network etc.)
Define address space authority boundaries per group
Finding free address space across a range
Split and join networks to make them smaller and larger
Display overlapping address space between networks
search capabilities, audit logs and statistics
Keeping track of and sending SWIP/RIPE/APNIC registrar information
DNS administration (forward and reverse zones, import existing zones via zone transfer)
Template system to extend IPplan to contain site specific information like circuit data, host configuration data, asset information
Device configuration file management
Link addresses together via pointers – ideal for NAT
Triggers – every user event can call a user defined function – useful to execute backend DNS scripts
External poller – scan subnets for active addresses to gather usage statistics
IP address request system – allows users to request static IP addresses from the database
IPplan’s own internal authentication scheme or an external Apache compatible system including single sign on systems like SiteMinder
IPPlan API for customisation
Install IPplan in SuSE / openSUSE
The installation procedure listed below is done on openSUSE 11.1 but should work fine on SuSE Linux as well.
Pre-Requisites
There is not much of a surprise here. IPplan requires Apache2, PHP and a Database software. To go with the LAMP tradition, I choose MySQL than anyother database. So, lets get started with installing the pre-requisites:
opensuse11:~ # yast2 -i apache2 mysql php5 php5-mysql apache2-mod_php5 php-zlib
This should install Apache 2 webserver, MySQL Database server and PHP5.
The following optional packages can be installed for multi-lingual and snmp support
php5-snmp – To import routing tables and directly query devices
php5-gettext – Multi-Lingial support
To install
opensuse11:~ # yast2 -i php5-snmp php5-gettext
Now, we are good to get IPplan installed. Download the latest stable package for IPplan (version 4.91a at the time of writing) from here
Untar & Unzip IPPlan source
Once downloaded, unzip and untar the downloaded file which will create the ipplan directory
opensuse11:~ # tar -zxvf ipplan-4.91a.tar.gz
Move, the ipplan directory to the Apache webserver root (/srv/www/htdocs).
opensuse11:~ # mv ipplan /srv/www/htdocs/
Change the directory ownership / permissions as follows:
opensuse11:~ # chown -R root:www ipplan
opensuse11:~ # chmod -R 750 ipplan
Create the following directory and set the permissions to allow users upload files:
opensuse11:~ # mkdir /var/spool/ipplanuploads
opensuse11:~ # chown wwwrun:www /var/spool/ipplanuploads
opensuse11:~ # chmod 750 /var/spool/ipplanuploads
MySQL Database
Now, lets get the MySQL Database, user created and privileges set:
If you installed MySQL just now, it is important to set the root password before proceeding to implementing ipplan.
Launch MySQL database server for the 1st time
opensuse11:~ # rcmysql start
Set the passwords as follows:
opensuse11:~ # mysqladmin -u root -p ‘your password’
For more information on LAMP in SuSE/openSUSE, click here
Create the Database
Logon to MySQL and create database.
opensuse11:~ # mysql -u root -p
mysql>CREATE DATABASE ipplan;
Query OK, 1 row affected (0.00 sec)
Set Database password
mysql> USE DATABASE ipplan ;
mysql> SET PASSWORD = PASSWORD(‘enterpassword’) ;
Create user
mysql> GRANT CREATE,ALTER,SELECT,INSERT,UPDATE,DELETE on ipplan.* TO ipplan@localhost IDENTIFIED by ‘password’;
Config.php
While almost all the default settings can be accepted, the password you set above needs to be updated on the config.pho file. Edit the config.php file in the ipplan directory and look for the line
define(“DBF_PASSWORD”, ‘ipplan’);
and set the password here. Also, look for the line
define(“ADMINPASSWD”, ‘admin’);
and set the password as you wish. This is required to run the install script.
Now, start the webserver
opensuse11:~ # rcapache2 start
Browse to
http://localhost/ipplan/admin/install.php
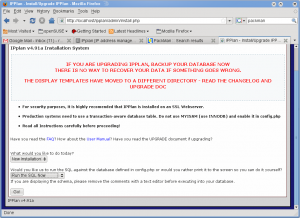
Here, select your language, select “Install” in the install/upgrade listbox and “Run the SQL now” in the next box and click “GO”
This should do. Browse IPplan as follows:
http://localhost/ipplan/
As a first step, create a new admin user (may be a new name or the username “admin” itself) and set the password to re-authenticate yourself. This can be done from “Admin – Users – Create a New user” set the group as “Admin – All groups”
That should all do…You can now, create users, customers, IP subnets. As you can see the software is very extensive when it comes to IP management. Telcos would love it as you can creat/manage customers, AS etc.For more detailed HOWTOs and screenshots, click here

